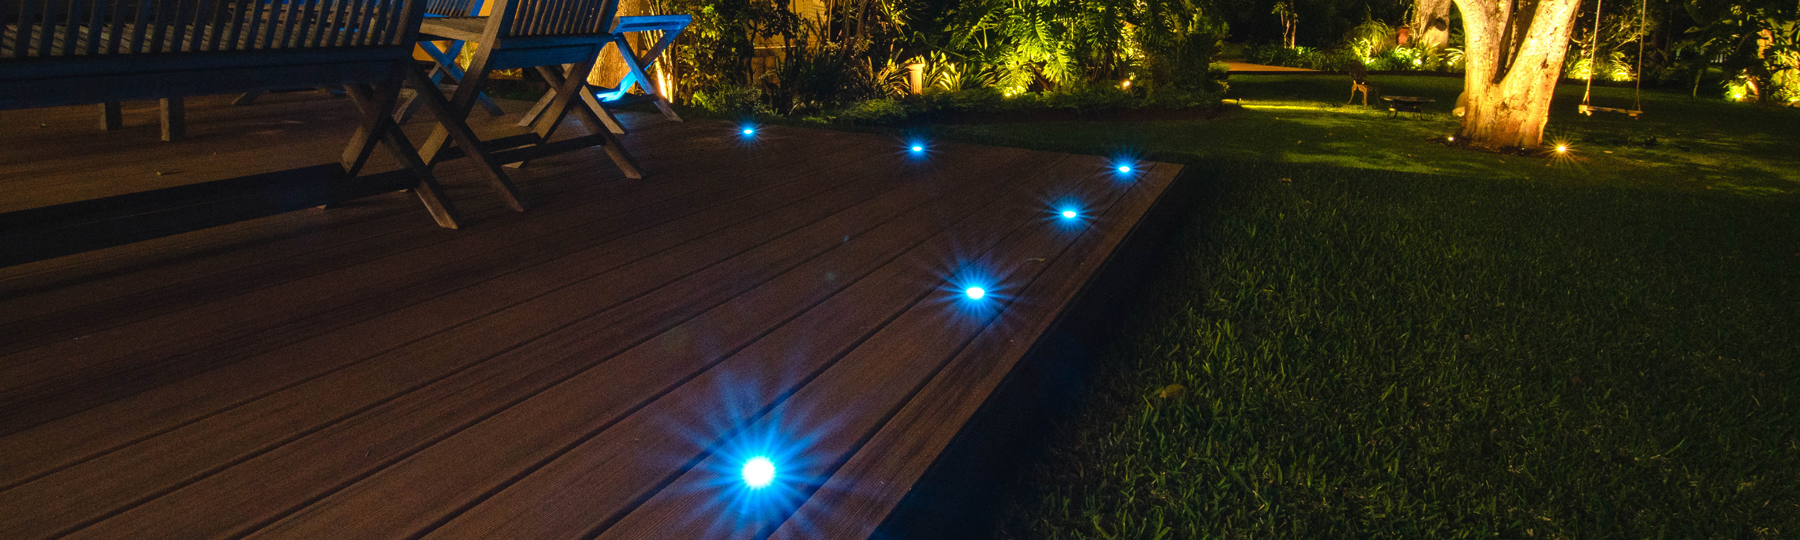
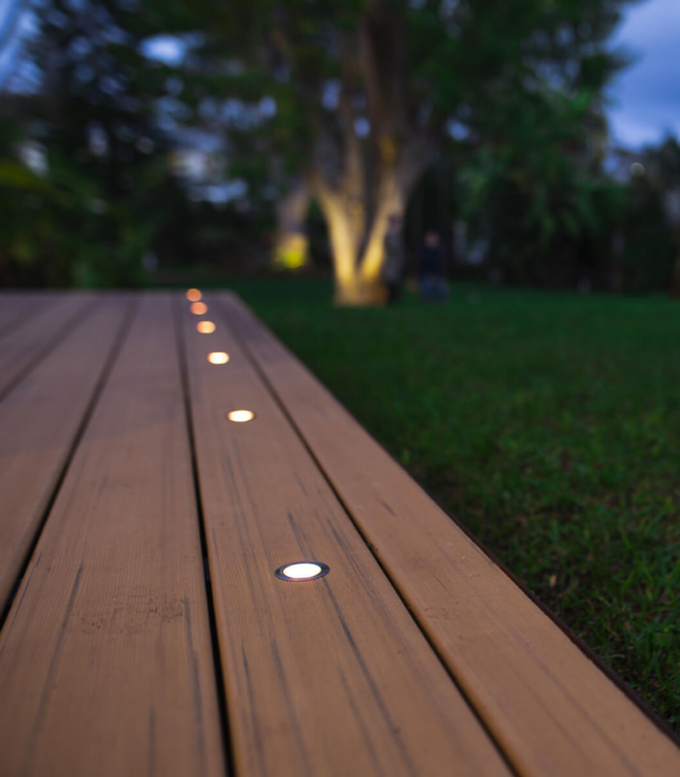
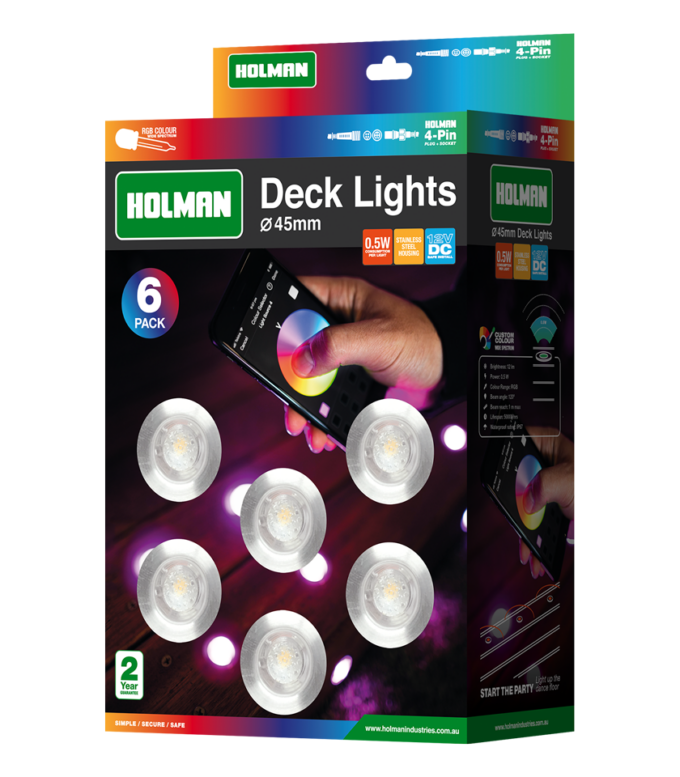
If you’ve been thinking about upgrading your deck, why not take it a step further by incorporating some of our Bluetooth® or Wi-Fi Controlled Deck Lights to help liven up your space.
Designed to help illuminate and add ambience to your outdoor space, our system is completely DIY so you can install Holman Deck Lights yourself. These can also be used to light up wooden steps or create a safety barrier around the edge of your decking. We will take you through the step by step process of choosing the right controller and lighting, how far apart to space your deck lights and the correct way to install them.

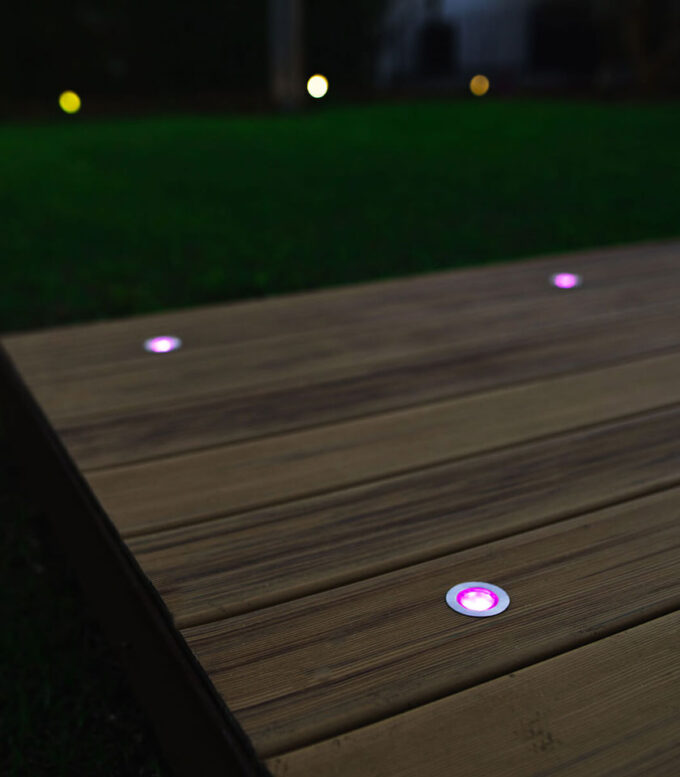
Use to light up steps to increase safety at night

Different sizes available to create beautiful features

Use to illuminate your deck border and create light shows at night time
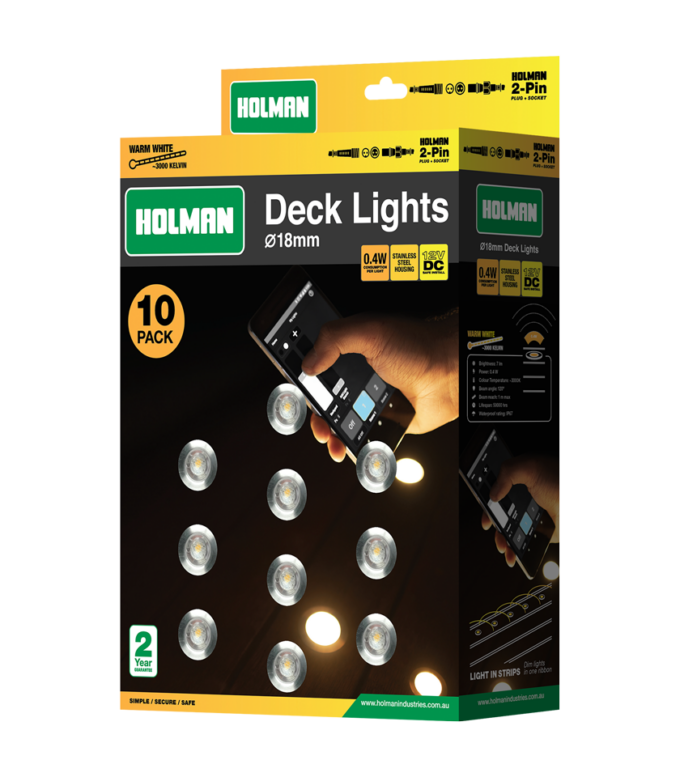
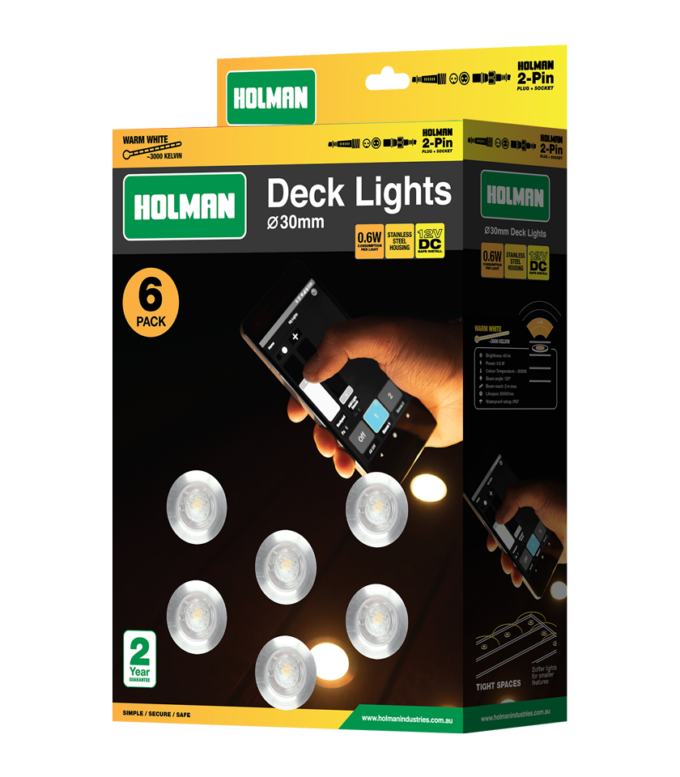
HOLMAN DECK LIGHTS SIZING GUIDE


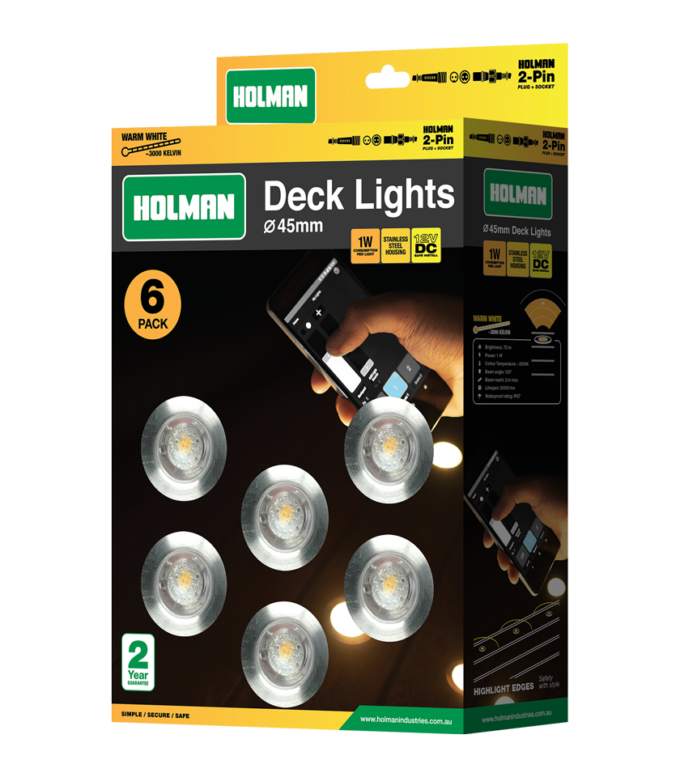
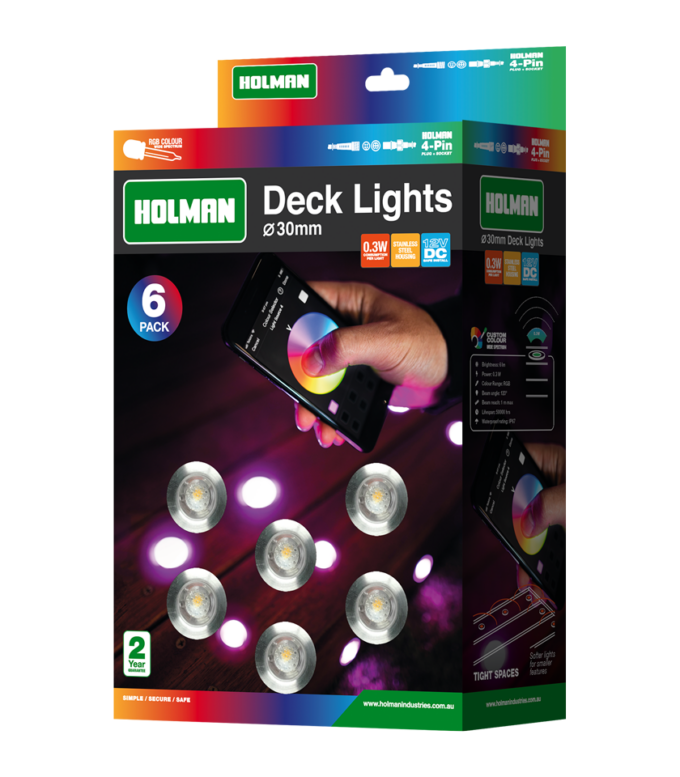
CHOOSING YOUR LIGHTING


STEP 1. PLANNING AND MARKING
Before you get drilling, planning out the correct spacing for your deck lights is vital. This will determine how many lights you require, and the length of cable needed to connect them to the controller. Our deck lights are automatically spaced out with up to 2m in-between each light. Plus, our Plug & Socket systems allows you to simply plug in and enjoy!
We suggest marking on your decking exactly where you want to have your lights and placing them out to ensure the spacing is correct.

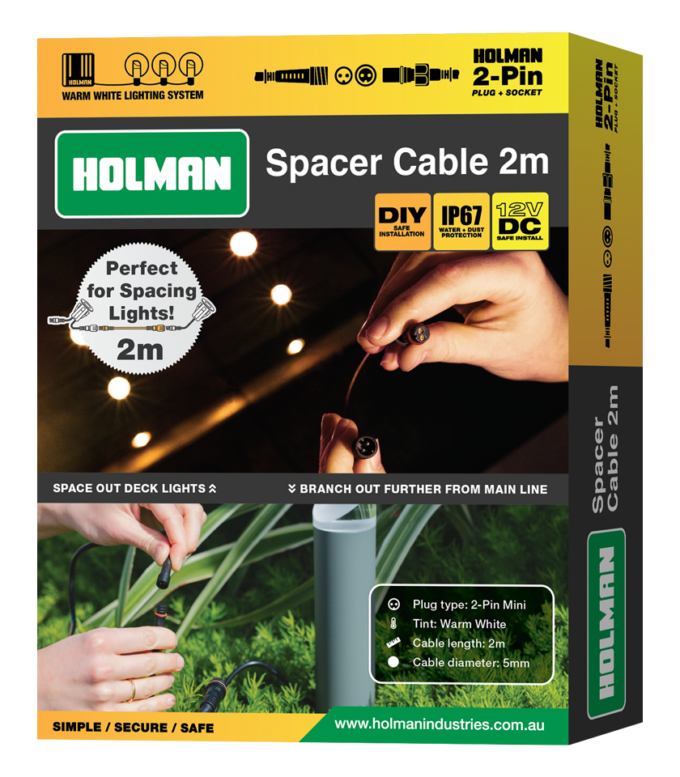
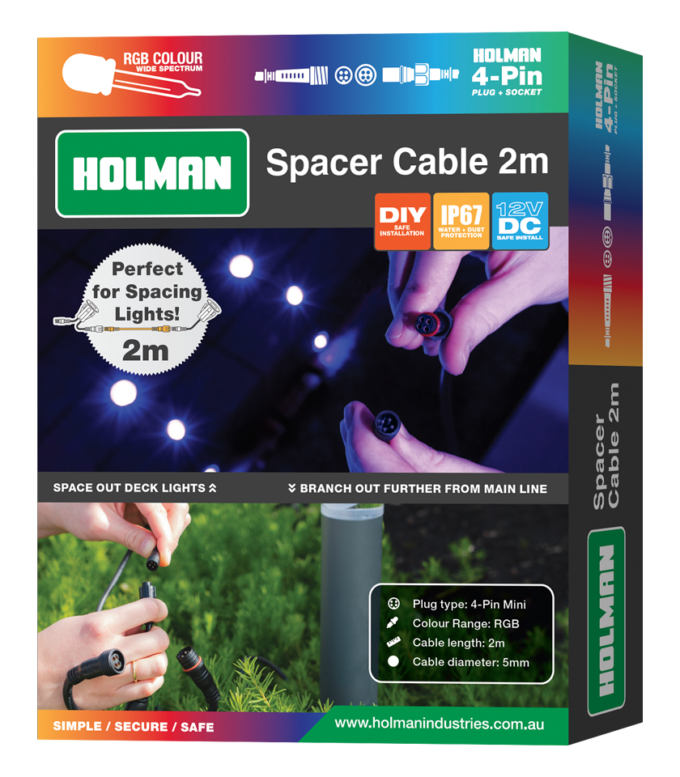

JUST LANDED!
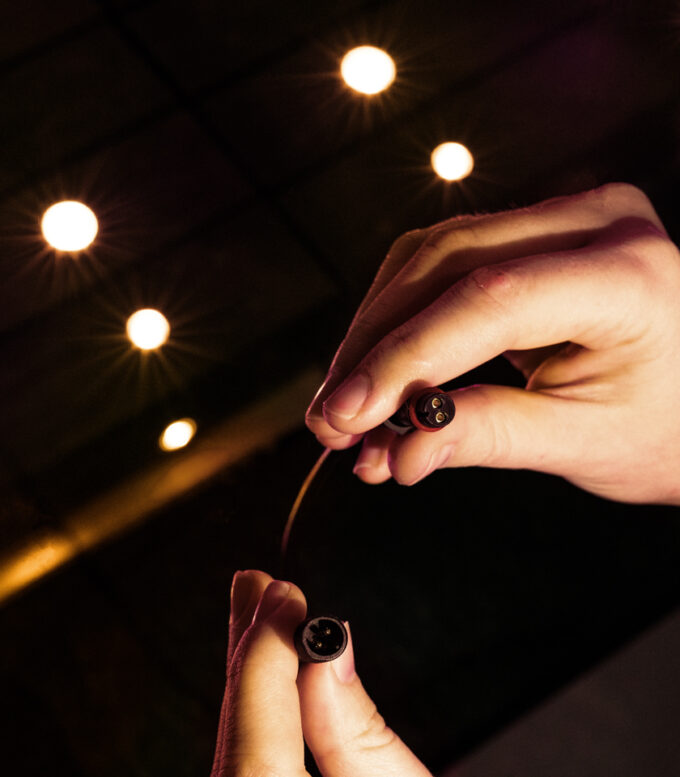
Our new Spacer Cables allow you to add an extra 2m of length in-between your deck lights, or they can be used to branch your lights further away from the main lighting cable!
* We recommend not to use more than 5 of these cables in a single line to avoid wattage loss to your lights.
STEP 2. DRILLING HOLES
Now that your marks have been made, if you can, we suggest removing the panels you will be drilling into. This is so you can connect the cabling together underneath your deck. It also allows you to check that there are no other cables or pipes behind your deck. Remove the desired panels and drill the required holes into your deck where you marked.
Refer to our sizing chart above to determine the size of the spade drill bit you’ll need.

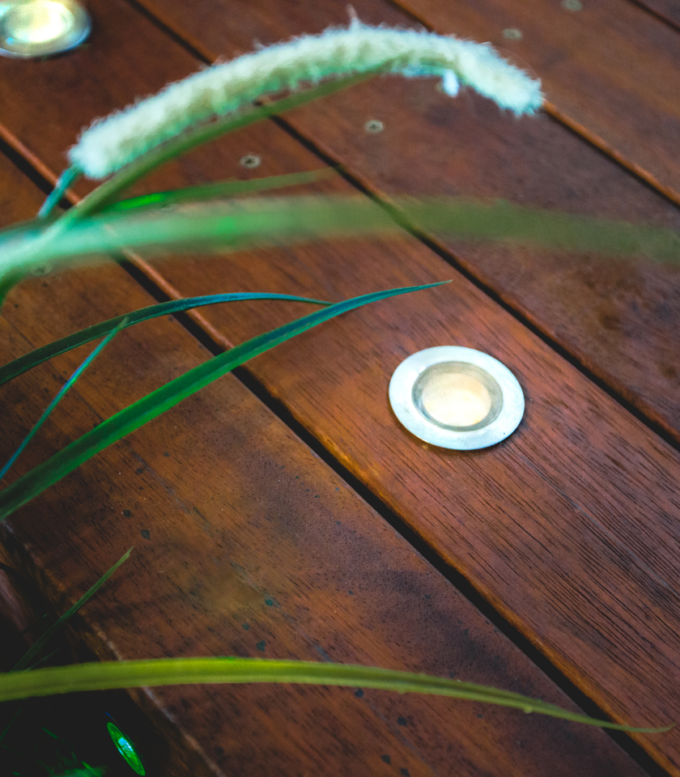
STEP 3. INSERTING LIGHTS
Push the deck lights and cables into the holes you’ve drilled, making sure the fixture is secured tightly with no more than a couple of millimeters to move. Ensure that each Deck Light is daisy chained together. To connect the starting light to your chosen controller, we have a range of connection cables available in various lengths.
Now that all of the deck lights are connected, you can place the decking boards back into their original position.
Note: We recommend no more than 12 deck lights to be daisy chained together. If your plan includes more than 12 Deck Lights, add an expansion tee and another length of connection cable from your controller to the next group of deck lights. You can read our help article about connecting multiple deck lights together here.

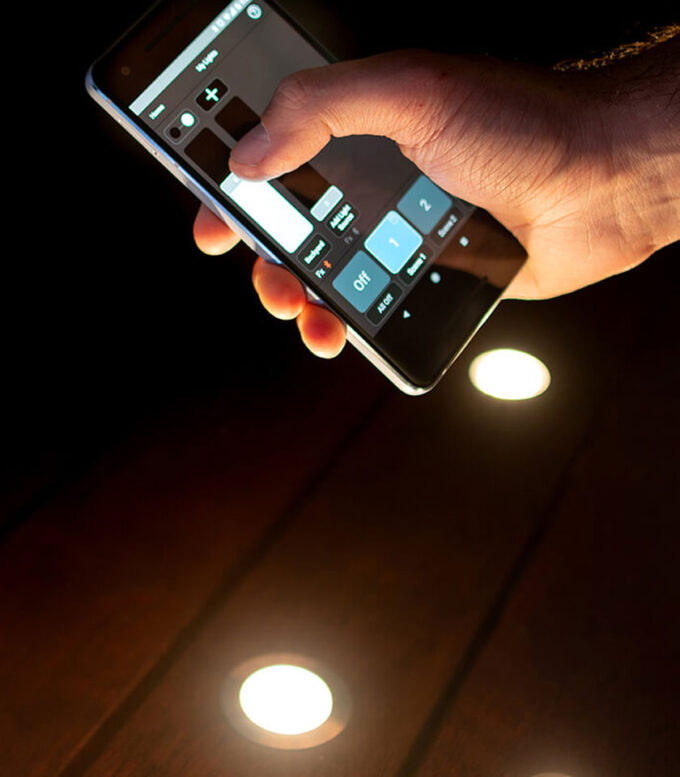
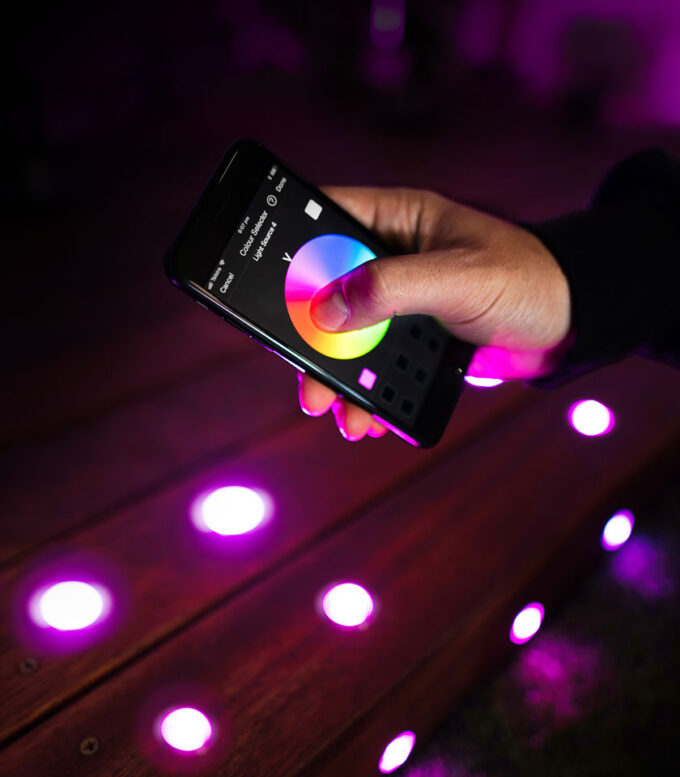
CONTROLLING YOUR LIGHTING
If you need help scheduling and setting up your garden lighting, we have a whole range of Garden Lighting FAQ’s, help articles and instructions available on our support page.
@holmangarden #SMARTGARDENER
Don’t forget to tag us in your deck light pictures on Instagram!


Get more practical gifts, straight to your inbox!
If you want to get notified as soon as we publish a blog, sign up to our newsletter! You’ll also receive exclusive deals and be the first to know about any new products.


bad design , why didn’t they have 1800mm tails on the lights so you can use yellow tong to pass wire to each hole without removing the decking, most decking is nailed down or the newer echo decking is clipped which makes it impossible to remove , great product but the bills that designed the decking lights to be joined in the middle should be sacked, majority of electricians would use another product
We have had the Bluetooth Controller and 18 x decks lights installed for 3 years now working perfectly and for some reason it’s stopped working, I have replaced the button battery in the LightSource Controller which didn’t fix it.
Should I now replace the whole Bluetooth Controller to see if everything will work or is it possible the lights will need replacing?
I have bought 2 sets of deck lights and 1 controller box, 1 set of lights and controller are 2 pin and the other set are 4 pin is there any way to intergrate or do I need another controller?
Hi Paul, it sounds like you have a 2-pin warm white controller, a set of 2-pin warm white lights, and a set of 4-pin RGB colour lights. Our RGB lights run on a 4-pin cable and will require an RGB controller.
can I use the 18mm lights in a 20mm hole
Hello, we wouldn’t recommend using an 18mm deck light in a 20mm hole. They will fall through and be difficult to reach. This will also affect the light they throw, as they will be sunken in the 20mm hole.
We’d suggest enlarging the existing hole to 22mm and buying the 30mm Deck Lights for your project. You can enlarge the hole using a variety of methods, the the easiest would be reverse drilling. Fit the next larger bit into your drill. Next, flip the drill into reverse mode using the button above the trigger. With the drill turning counterclockwise, it greatly reduces the chance that the cutting edges of the bit will bite into the wood and cause tearout or scarring.
How is the controller hub powered? Do you need to plug it into a/c power?
Hey Anthony, yes that is correct. All of our lighting controllers need to be plugged into AC power.
Where are they made? I don’t really care where they’re designed, just want to know where they are manufactured.
Hi Mark, our lighting is made in our manufacturing Wearhouse in China.
Hi
I’m assuming by the reply above, the deck lights can’t be removed without damaging them? We had the rgb lights installed by the landscaper and would have preferred white. If it’s not possible we’ll learn to live with.
Thanks
Hi Gavin, our deck lights can be easily changed or removed. However, you will need to make sure you have the correct warm white controller, warm white cabling and warm white deck lights to do so. We have an article available here that explains how to get the closest to ‘warm white’ using your RGB colour controller, this may be helpful if you do not wish to change your whole system. Please let us know if you have any other questions!
Thank you for your quick reply, it’s much appreciated.
DEck lights have been working fine for 1.5 years since install. One of the lights is now now illuminating like the others, how would I replace this light. All others are working fine. It definitely has not been running for more than 30,000hrs..
Hi Kevin, thanks for your question and we are sorry to hear that you are having troubles with your Deck Lights. This issue may be caused by a faulty product, if you can please get in touch with our customer service team at support@holmanindustries.com.au they will be able to assist you with your lights. Thanks, Dayna.
Hello
Sam here if want to multiple colours how can I change because now it’s working with my mob app Holman
Hi Sam, can you please let us know if you have a Wi-Fi Controller or the Bluetooth Controller? Thank you.
G’day
Quick question if you had to replace light how do remove?
Hi Kelvin, all our lights have LED’s which equals to about 30,000hrs lifespan per light. It would be a long time before you had to change them unless there was a fault or you changed your mind. We recommned plugging in the lights before installing them to ensure they’re all working properly. Thank you!