Our Holman GreenWall range is the new way to gardening.
Are you living in a smaller space or an apartment where ground gardening isn’t available, but you still want to grow edible or decorative plants? Or perhaps you may have exhausted all the ground space available for gardening but want to add even more green into your life? At Holman we are leading the way with clever growing solutions that work in non-traditional applications – like growing on a wall!
Vertical GreenWall Advantages
- Available in five different DIY configurations
- Convenient included in drip irrigation – no messy watering required
- Ability to grow plants in narrow and small spaces
- Popular gardening solution for apartment balconies
- Transform a blank wall into a living green wall
- Vertical GreenWalls are modular so you can create large feature installations
- Detachable pots for easy maintenance and replanting
- Harder for pests, like slugs and snails, to access
Shopping List
1. Holman GreenWall best suited to your space (view our full range here)
2. Good quality potting mix with added compost or slow release fertiliser
3. Coir peat brick
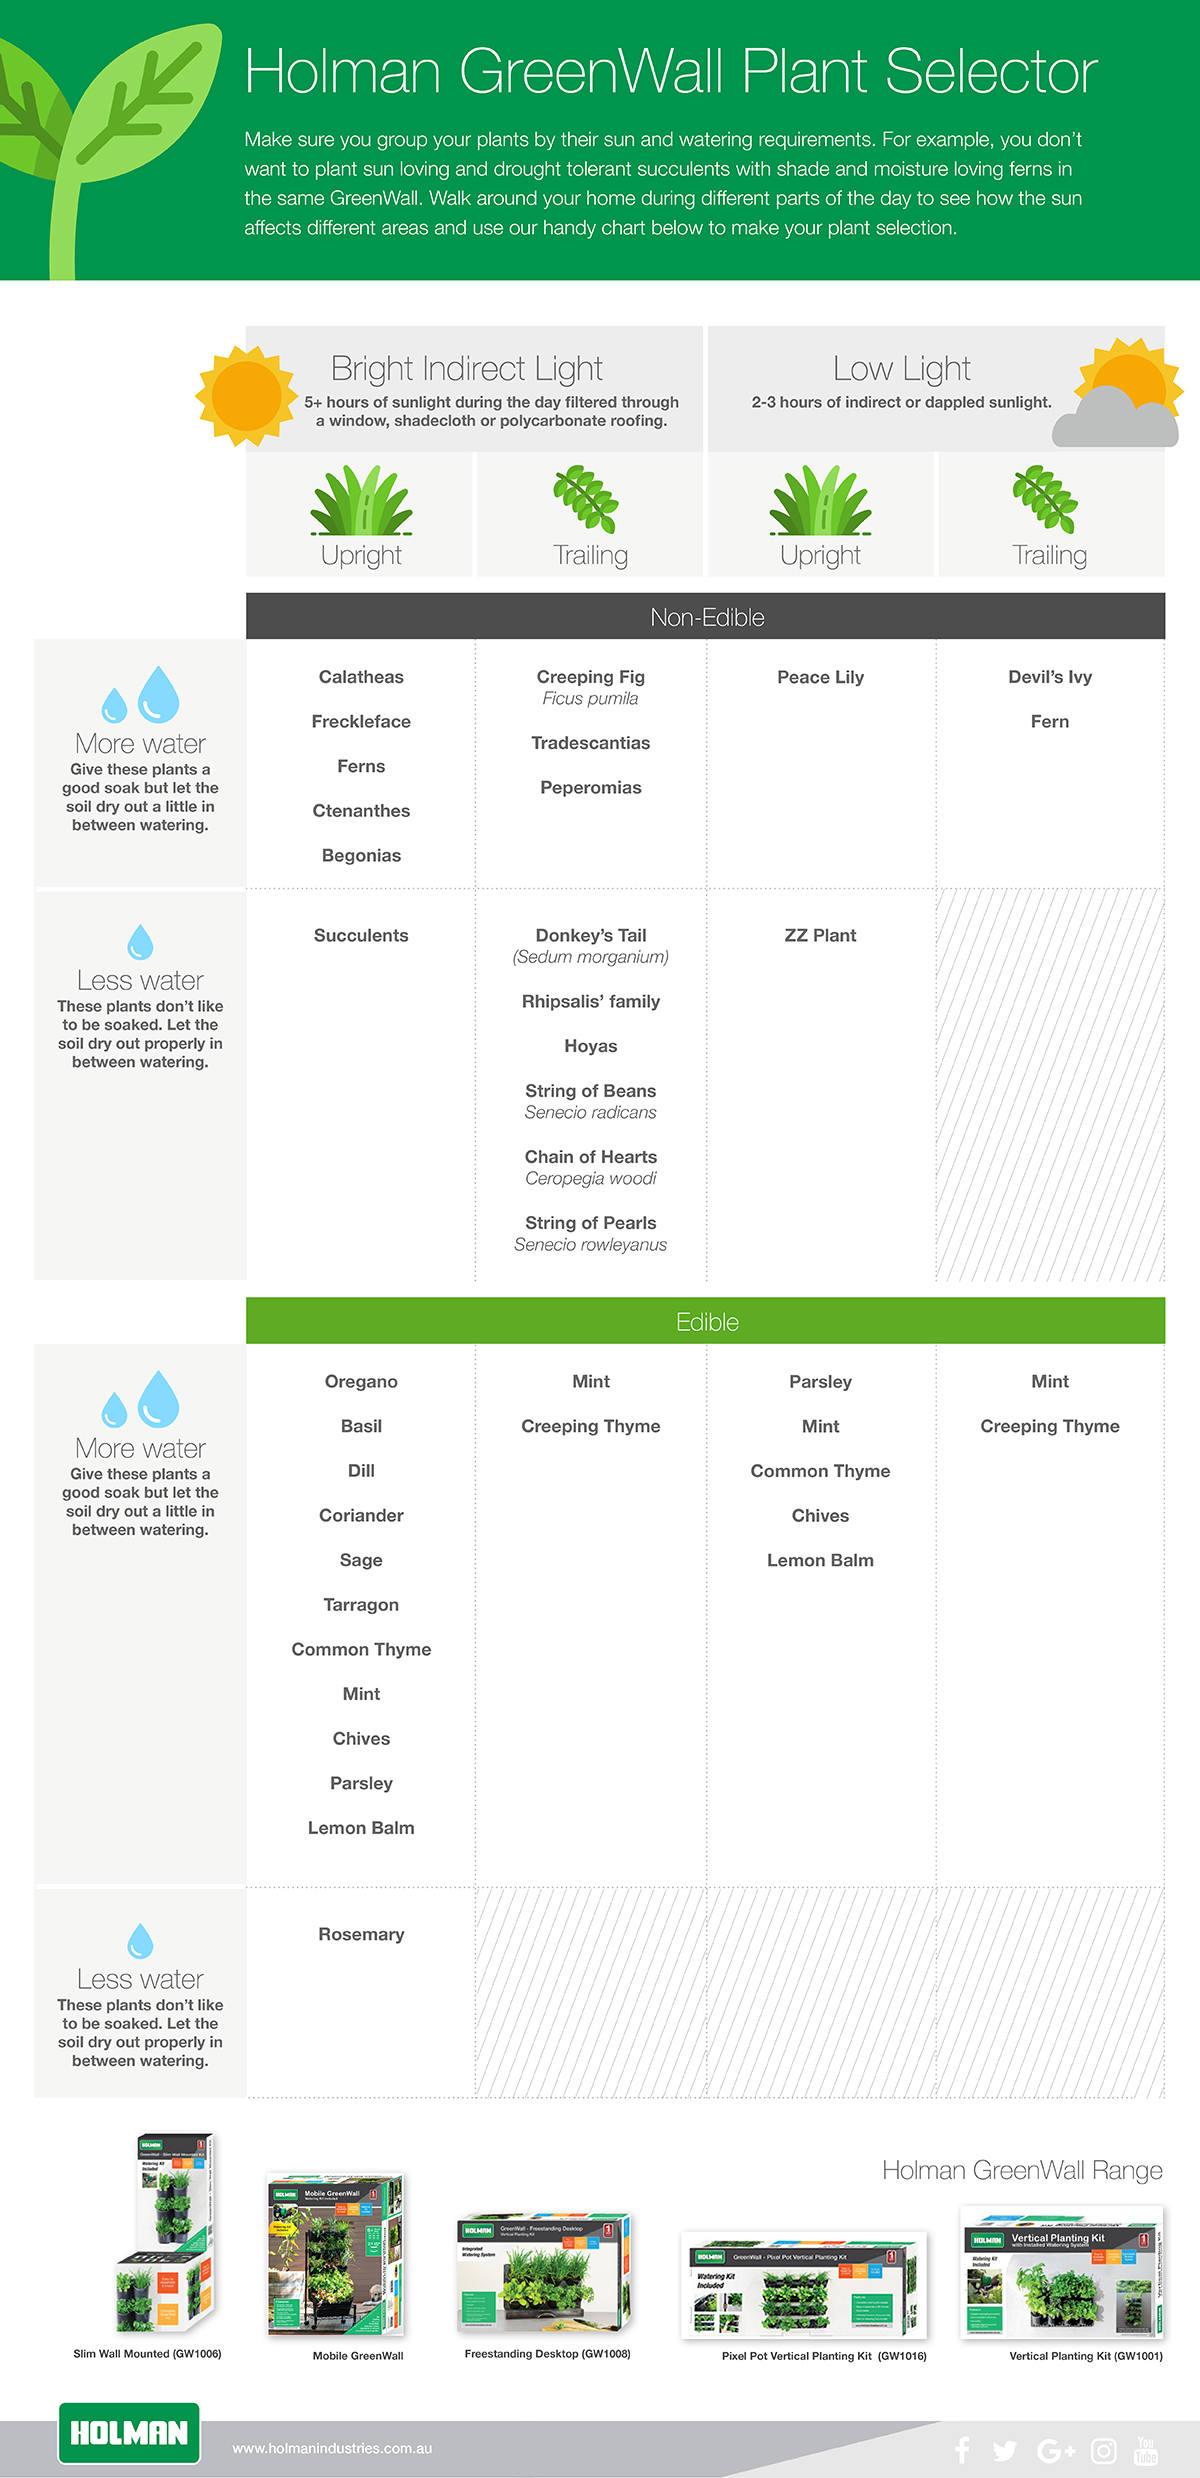
4. Plants of your choice – refer to our plant selector chart below
5. 6.5mm drill bit suitable for the substrate you are mounting your GreenWall on
We used the GreenWall Pixel Pot Vertical Gardening Kit (GW1016) and:
• 1 × 6L potting mix bag
• 1 × coir peat brick
• 16 × seedlings (combination of ferns, devils ivy and bromeliads)
Tools
• Drill
• Bucket & Trowel
• Hammer & Screwdriver
• Spirit level if you have chosen a wall mounted GreenWall
Sunlight & Water
Before starting your project consider the amount of sun your area receives. If you have eaves or a veranda, check how the sun exposure changes during the day making sure the wall you want to mount on still receives enough sun. Full sun (5+ hours) to part sun (3+ hours) gives you a lot of variety of plants to choose from. If you experience very hot summers, a mild morning sun position is preferable to a hot afternoon sun position. Also consider where your water source will be and how easily you can run a hose from that tap.
Plant selection
Make sure you group your plants by their sun and watering requirements. For example, you don’t want to plant sun loving and drought tolerant succulents with shade and moisture loving ferns in the same GreenWall. You should also group edible and non-edible plants together, and not mix them on one wall. Refer to our plant selector chart below if you need assistance with this.

STEP 1: Installing the GreenWall panels
- Determine how many panels you want to install.
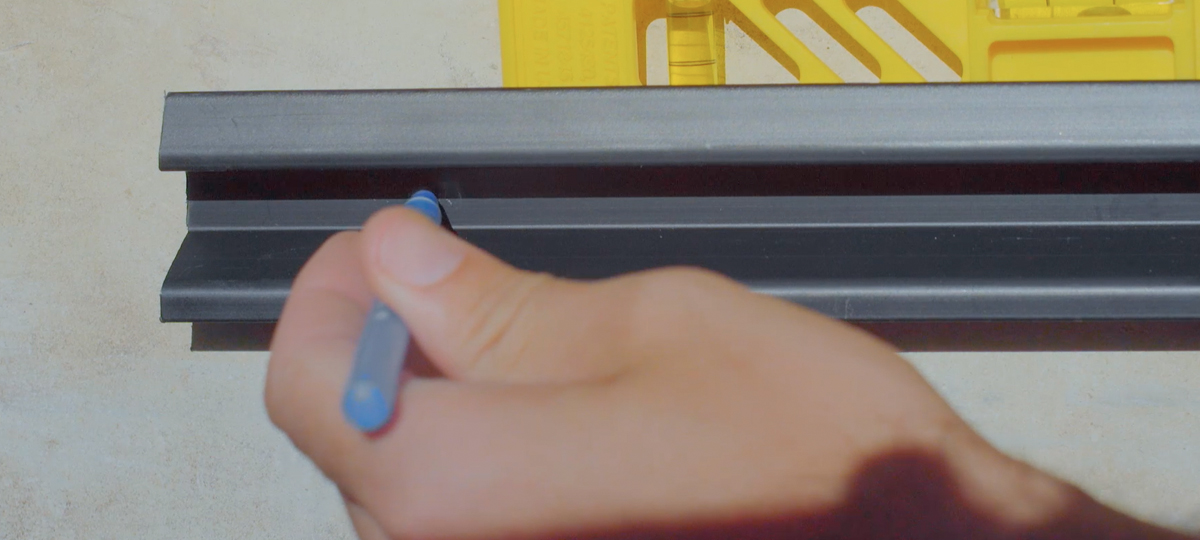
- Once you have determined where your first panel will be located you hold it against the wall and get it level (use a spirit level). It is most important that you get it level if you are going to add more panels because a small level error will magnify as the line of panels grows longer.
- Next you need to mark the wall to position the holding bracket.
- If attaching to a solid wall such as brick or concrete, use a 6.5mm masonry bit to drill all three holes.
- Insert the plastic wall plugs which are supplied
- Fix the bracket to the wall using the stainless steel screws provided.
- Hang the panel onto the brackets.

STEP 2: Installing the irrigation system
- Install the watering system by locating the poly tube with the drippers in the top bracket. This will allow the water to drip through the distribution holes in the panels and leaving a wet puddle in the recess in each panel.
- Place the drippers between pot 1-2 and 3-4. If some drippers are not working well, you can unscrew or slightly loosen the cap of the dripper.
STEP 3: Mixing up your potting mix
1. Break up the coir peat in a bucket and water it down. Let it stand to absorb the water. Check every few minutes to see if the peat requires more water as it soaks. This may take up to 30 minutes depending on how much you have broken the brick up.
2. Add in potting mix to a 70:30 ratio (potting mix:coir peat). Give this a good mix.
STEP 4: Potting your plants
- Plant the hanging pots before you attach these to the panel. One of the real breakthroughs in the Holman GreenWall system is that pots can be removed from the frame. This means that you can do your potting at a bench at a good working height.
- When you are ready to start planting, squeeze the bottom of the seedling containers to ease the seedlings out. Gently ease apart the bottom of the roots on each seedling. This will help the roots develop and grow into the soil.
- Put a handful of potting/coir mix into the GreenWall pot and place your seedling in. Top up with extra mix and press the plant in firmly.
STEP 5: Inserting the pots into the panel
1. Place the pots into the panel. Each pot has a slot for a hook. Turn the pot to ‘lock’ it into position.
2. If you are going to grow a mixture of plants in your GreenWall then it is worth noting that the top row is best for taller growing plants as their natural vertical habit of growth won’t be inhibited.
For the rows beneath, it’s better to choose plants with a trailing growth habit so these can get out from under the top pots to get access to sunlight.
STEP 6: Connecting water to the irrigation system
1. Once the plants are in place connect a hose from a tap and click it into the hose connection.
2. We suggest connecting the irrigation system of the GreenWall to a Holman Bluetooth Tap Timer. This will provide your plants with regular automatic watering.
3. We recommend watering once a day for 1-2 minutes in cooler and 2-3 times a day for 1-2 minutes in warmer weather. Watering will vary depending on your plant selection and the location of your GreenWall. Everyone’s GreenWall conditions will differ in sun exposure, temperature and air flow so we recommend checking the soil moisture after the first few waterings and altering your watering schedule as necessary.
TIPS
Coir peat
Coir peat aerates the soil and creates channels for water to travel through, watering the pots beneath. Regular potting mix that you would use in a garden bed may become to dense and block up the water channels inhibiting effective vertical watering.
Replacing plants
Once growing on the module if something goes wrong, it’s easy to remove a single pot and sort the problem and even replant and then pop it back into its original position.


 No products in the cart.
Good job,
Hi, how would you install to a colorbond fence. We want it to go on a colorbond fence, do you have attachments for them.
You can attach the GreenWall using some wire hooks. That way you can attach the GreenWall without having to drill in the fence.
Can I set this up as a inside vertical wall garden, obviously not using the drippers.
Hi Lola,
We wouldn’t recommend setting this one up indoors. Even without the drippers, you will still need somewhere for the water to drain when you do hand watering. You could try our Freestanding Benchtop Greenwall as an indoor alternative. If you have any more questions, please let us know 🙂
How do I instal the drip irrigation? Can’t make head nor tail of your incredibly brief instructions on this
Hi Mary,
If you’d like to go into more detail with how to install your drip irrigation, you can get in touch with our Customer Service team via email at info@holmanindustries.com.au or over the phone at 1300 716 188. They’ll be able to help you with any finer points that aren’t clear enough.
Cheers,
Nathan
I have the same question. I can see the final result from your links, but would love some help with how to attach the brackets to the hooks in order to hang it on the fence. Thanks.
Hi Heather,
We suggest looking in to shed hooks similar to these ones on the Bunnings website.
The key thing is to make sure the hooks will fit over the top edge of your fence. The GreenWall itself will have holes in the back where the other end of the hooks should fit in to.
Hope this helps. If you have any more questions, leave a reply here or feel free to contact our Customer Service team!
Cheers,
Nathan
How would you go about attaching it to a Colorbond fence?
Hi Anthony,
We’ve seen customers use various sorts of hooks to hang our GreenWall mounts off fences, examples of which you can see here and here.
Hope that helps! Thanks for getting in touch and let us know if you have any more questions!
Cheers,
Nathan