Scene Automation Example - Cancel the scheduled watering for the WX1 Tap Timer when the Soil Moisture is greater than 50% and send an app notification when cancelled (must have a Smart Moisture Sensor attached)
Using your connected WX1 Tap Timer create an Automation scenario that cancels Start A/B/C if the Soil Moisture is > 50% and then sends an app notification. Note: If your Smart Moisture Sensor threshold is set at 60% but you really want it to be 50% then use this example. This automation requires a Smart Moisture Sensor to be attached to the WX1 Tap Timer.Note: Due to the WX1 to cloud communication required it may take from 30 seconds to 2 minutes to cancel the watering. If the Smart Moisture Sensor threshold is set to 60% then this automation will only be cancelling scheduled waterings when the Soil Moisture is between 50-60% as above 60% the system will ignore any scheduled waterings
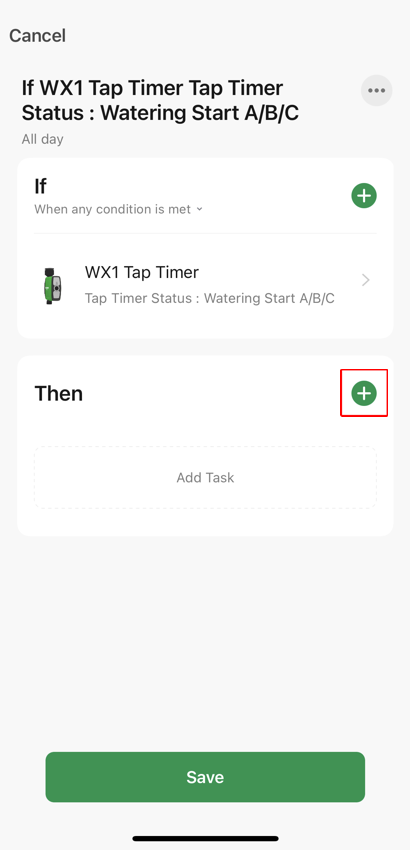
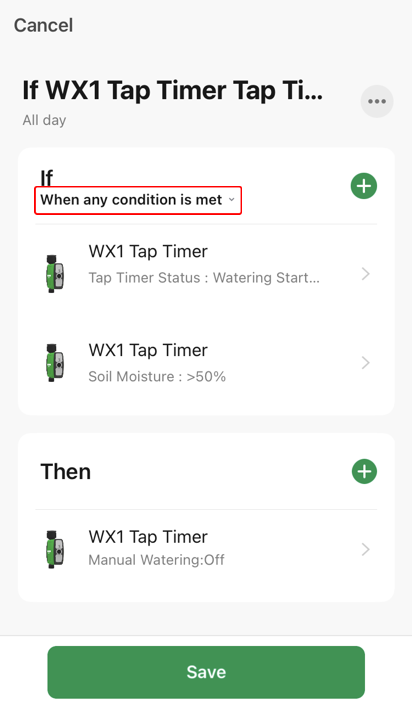
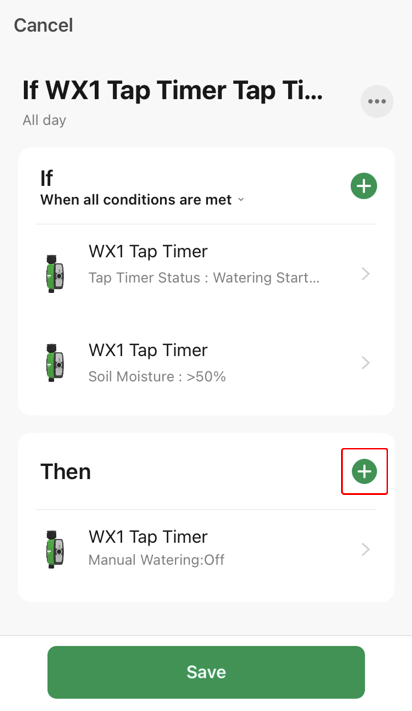
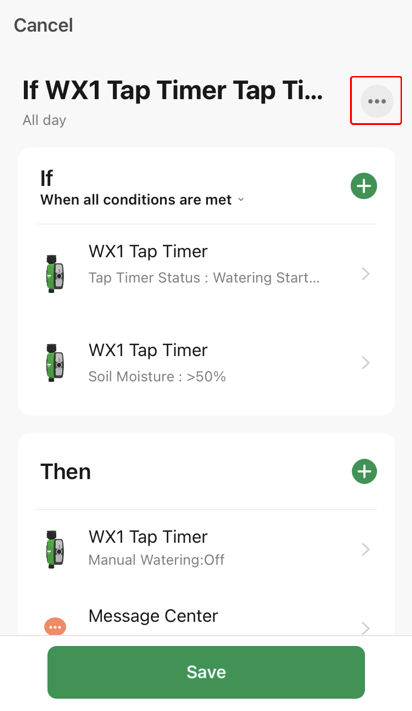
This is a screenshot of the finished example, see below for the steps required to create it. Please ensure you select When all conditions are met.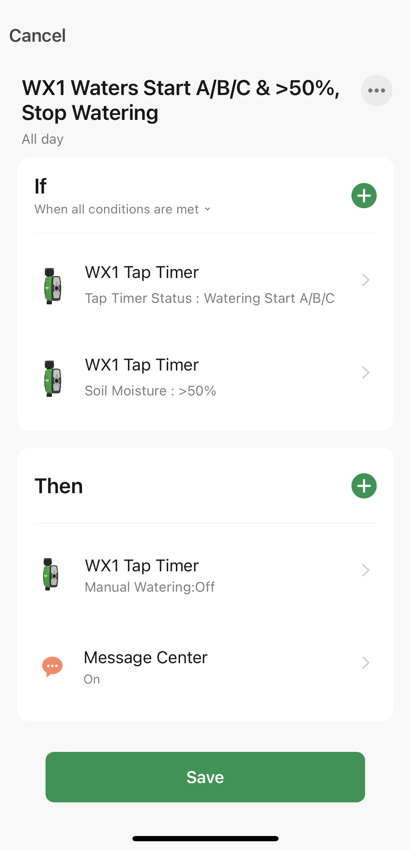
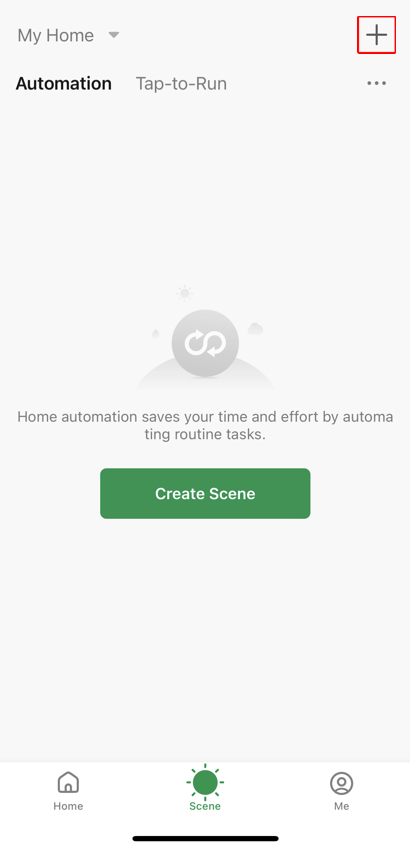
- From the Scene screen with Automation chosen, choose + (the top right hand corner)
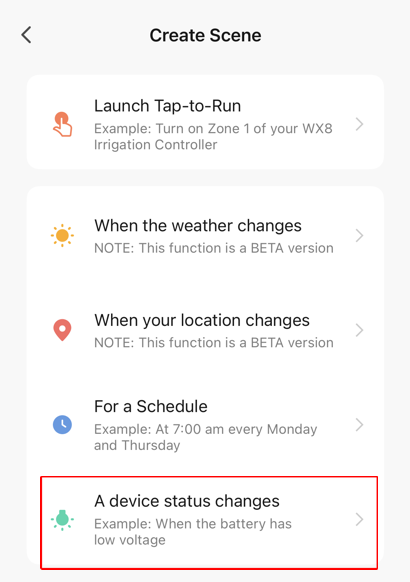
- Choose When device status changes
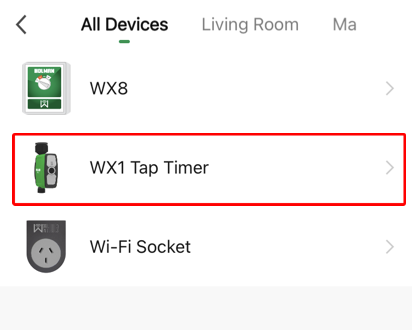
- Choose WX1 Tap Timer
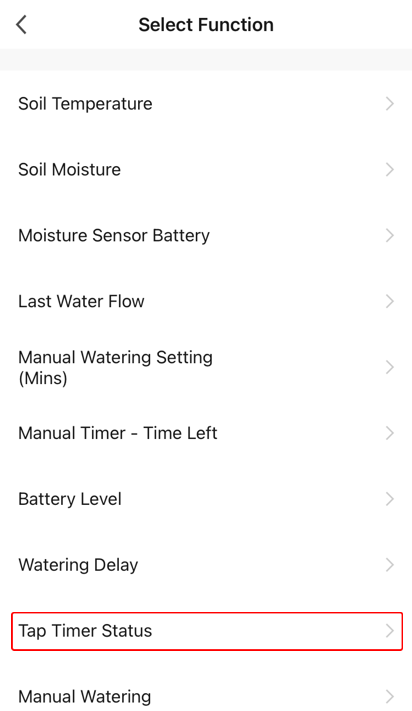
- Choose Tap Timer Status
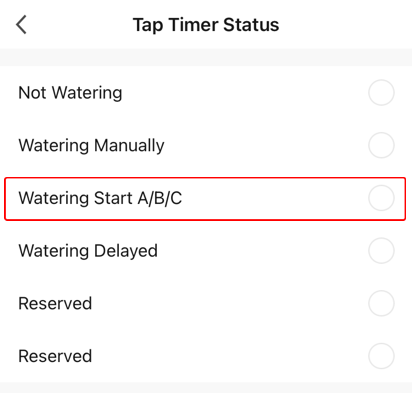
- Choose Watering Start A/B/C
- From the Then section choose +
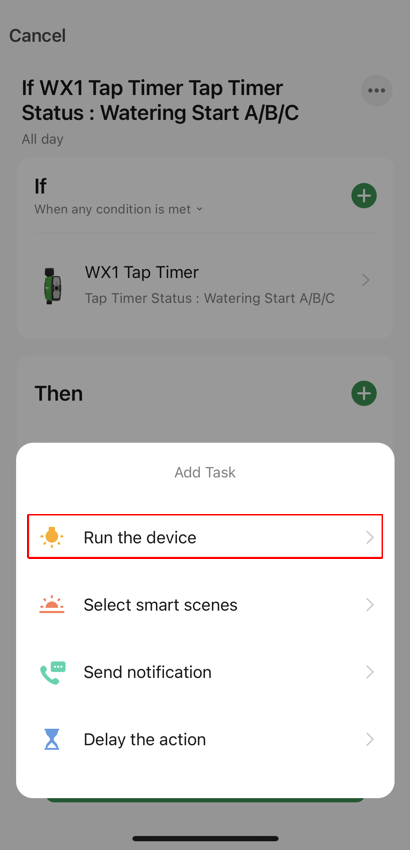
- Choose Run the device
- Choose WX1 Tap Timer
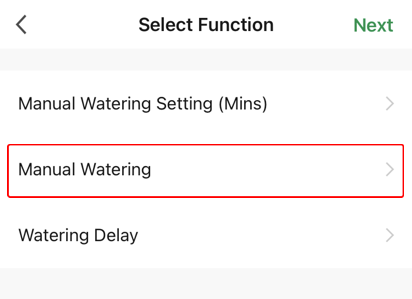
- Choose Manual Watering
- Choose Off and then choose Save
- Choose Next
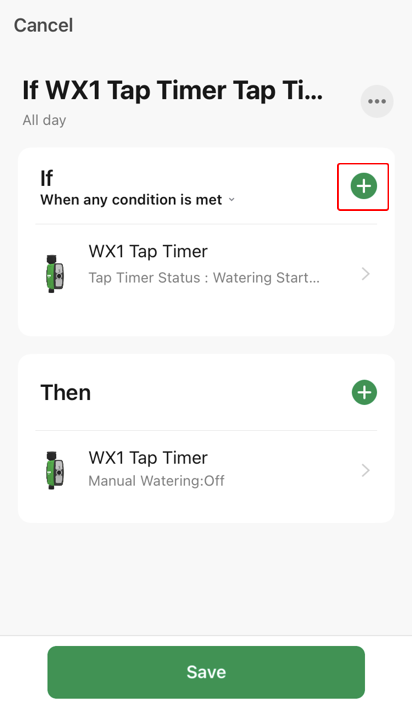
- From the If section choose +
- Choose When device status changes
- Choose WX1 Tap Timer
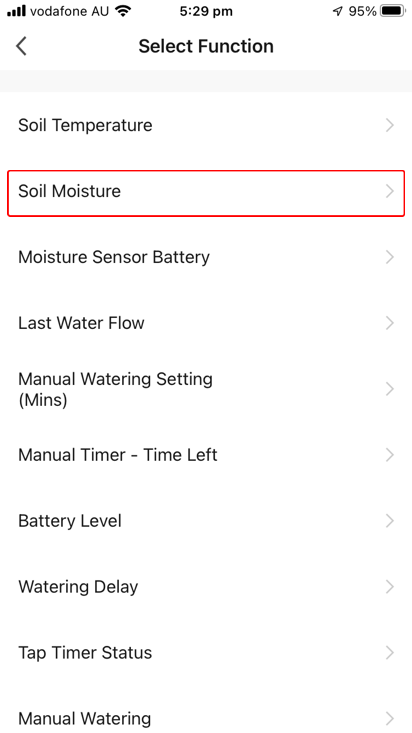
- Choose Soil Moisture
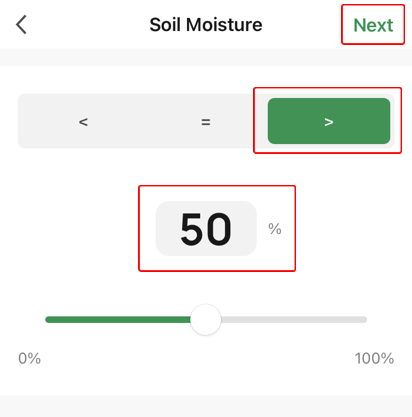
- Choose >, make the percentage 50 and then choose Next
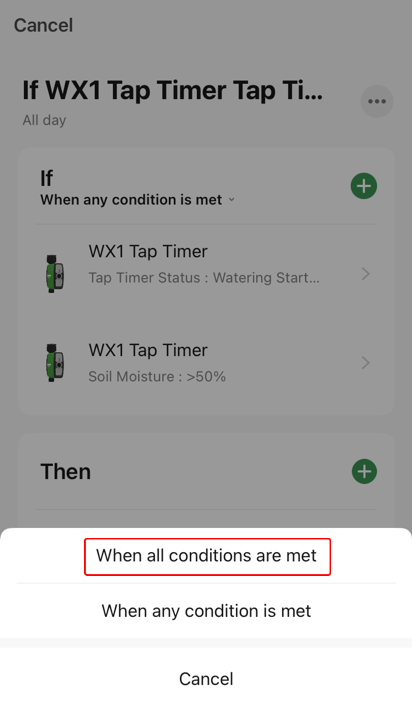
- Choose When any condition is met
- Choose When all conditions are met
- From the Then section choose +
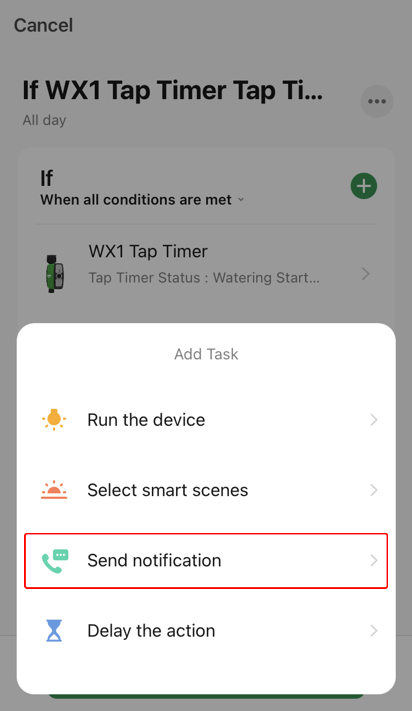
- Choose Send notification
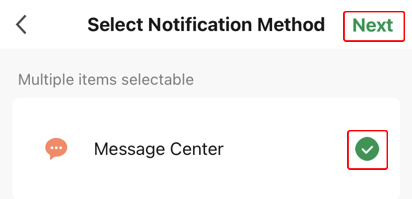
- Choose Message Center and then choose Next
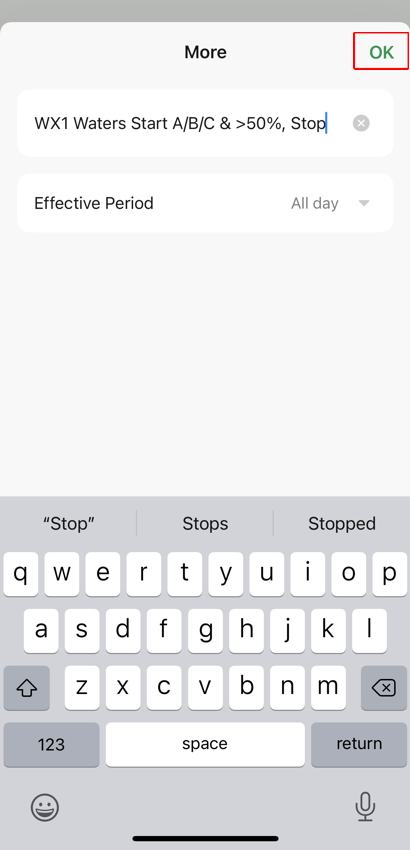
- Choose ... to give the scenario a better name
- Tap in the default name and edit it. Then choose OK
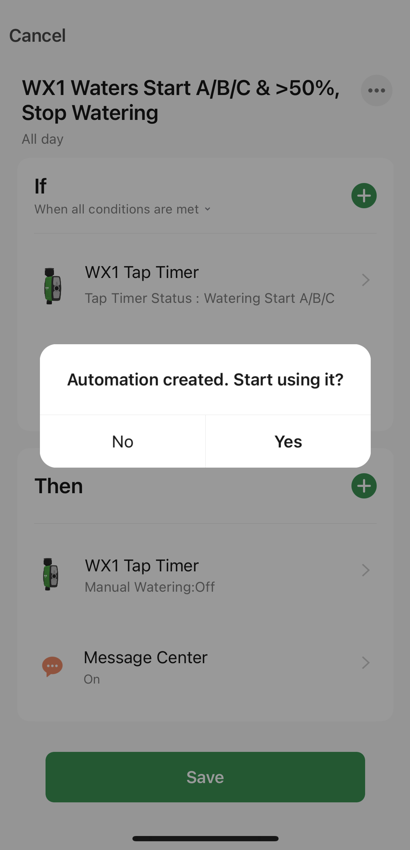
- Check everything is correct and then choose Save
- Choose Yes to start using the new Automation
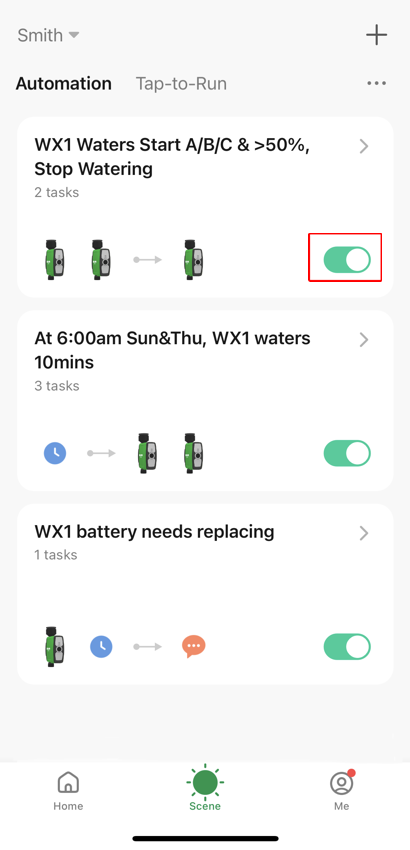
- View all your Automation scenarios. Note it is possible to disable the Automation scenario using the toggle in the red box below