Scene Automation Example - Setup a Watering Schedule for the WX1 Tap Timer that also sends an app notification when the watering starts
Using your connected WX1 Tap Timer create an Automation scenario that will water for 10 minutes at 6am on Sundays and Thursdays and send an app notification to the Message Centre in the Holman Home app when the watering starts. Note: This automation will not be influenced by any attached Smart Moisture Sensor and so will water regardless. This is a screenshot of the finished example, see below for the steps required to create it.
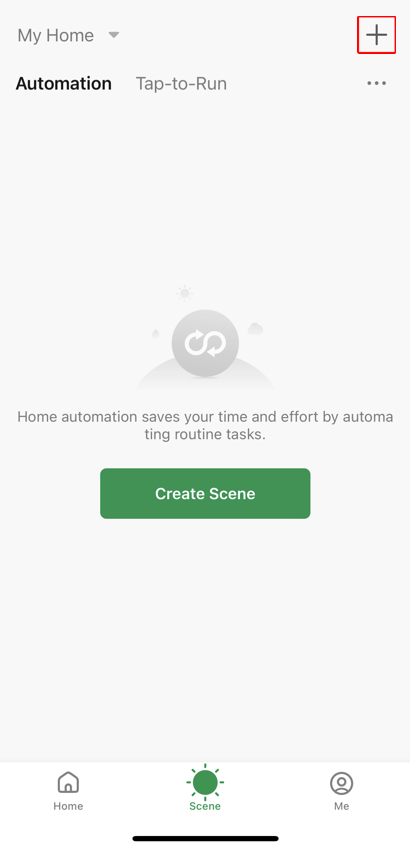
- From the Scene screen with Automation chosen, choose + (the top right hand corner)
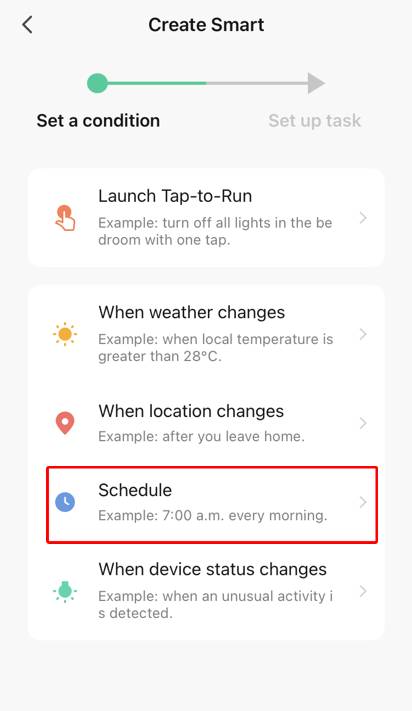
- Choose Schedule
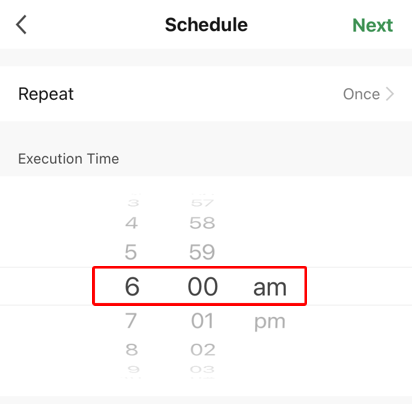
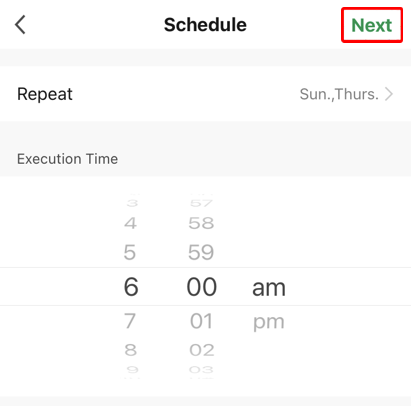
- Set the watering start time. In this example we are setting it to 6:00am
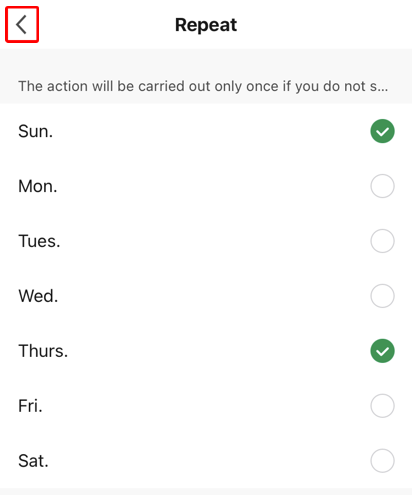
- Choose Repeat
- Choose the appropriate day/s of the week. In this example we will choose Sun and Thurs Choose < when done
- Choose Next
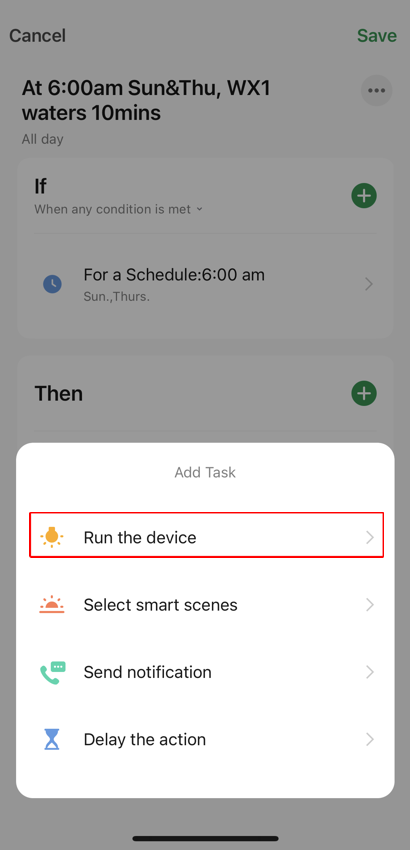
- From the Then section choose +
- Choose Run the device
- Choose WX1 Tap Timer
- Choose Manual watering Setting
- Set the appropriate watering time. In this example we are setting it to 10 minutes Choose Save when done
- Choose Manual Watering
- Choose On and then choose Save
- Choose Next
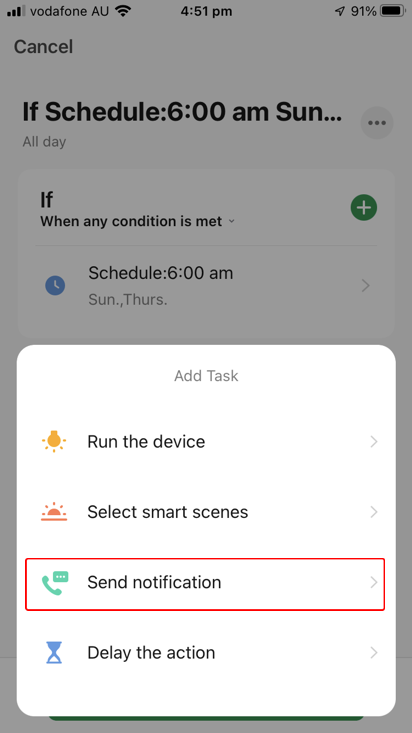
- From the Then section choose +
- Choose Send notification
- Choose Message Center and then choose Next
- Choose ... to give the scenario a better name
- Tap in the default name and edit it. Then choose OK
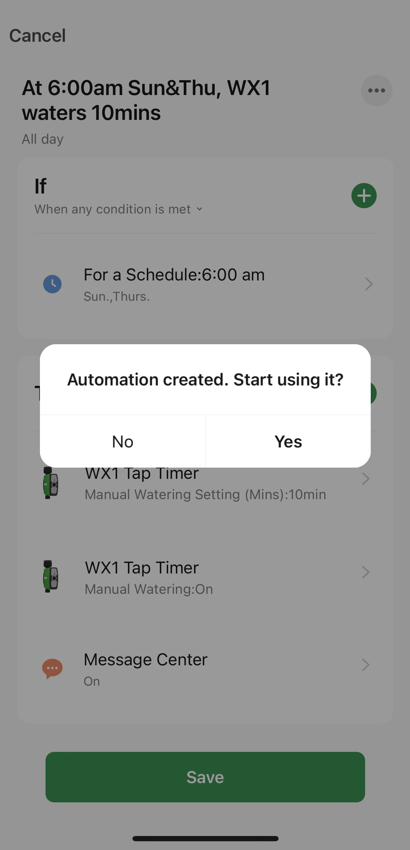
- Check everything is correct and then choose Save
- Choose Yes to start using the new Automation
- View all your Automation scenarios. Note it is possible to disable the Automation scenario using the toggle in the red box below